
Index of this article
Learn to embroider napkins
Do you like to embroider napkins? In our life we share special moments with our guests, whether they are family or friends. It is important to us that you feel comfortable in our house. Upon receiving them we put the best and most beautiful tablecloths, coasters and even embroidered napkins.
If you already have some experience with embroidery techniques, you can choose between freehand embroidery, cross stitch, ribbon embroidery, sashiko embroidery, crewel embroidery, Brazilian embroidery, machine embroidery, or any other well-known embroidery technique.
Below are some great ideas that you can apply to your next project, depending on the occasion.
Embroidery for elegant napkins
Since there are several types of embroidery, in this case we will talk about embroidery on elegant napkins. One of the most used measures for napkins is the following: 30 x 30 centimeters. Remember to cut the edges of the napkins evenly with good scissors. To fold the napkin, use an iron, very carefully, so as not to damage the material. If you don’t know or don’t want to embroider by hand and you have an embroidery machine at home, try working with it. Choose the models that you like the most and try them. Machine embroidered napkins look great and the work is very professional.
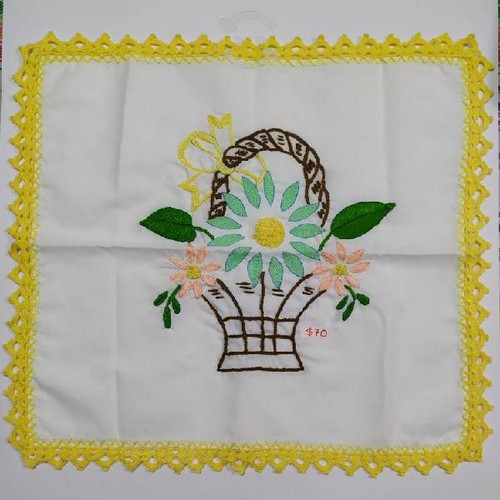
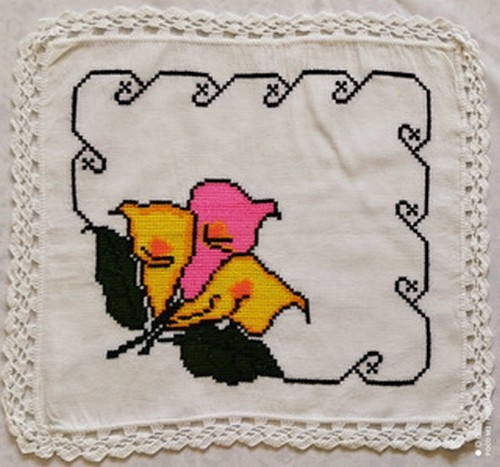
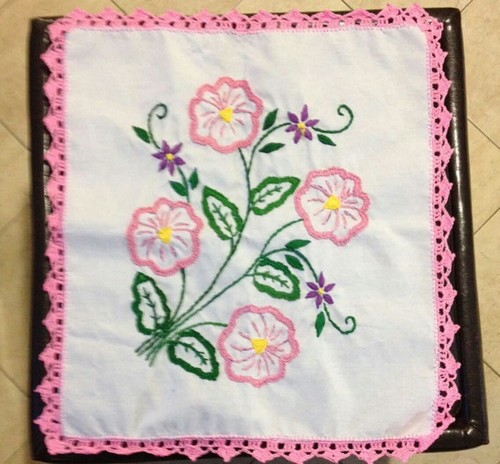
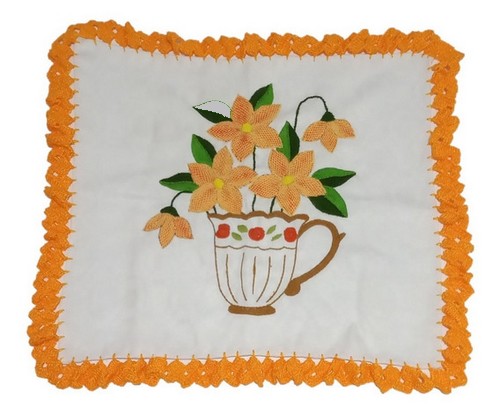
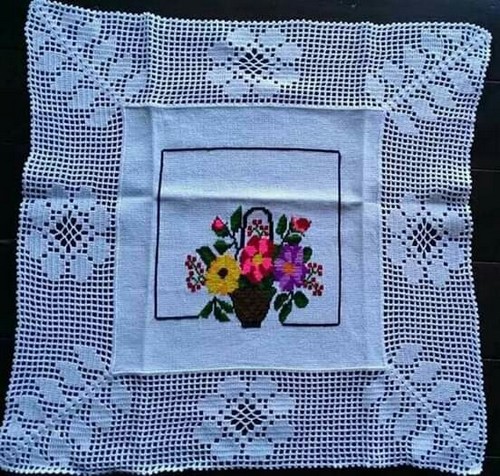
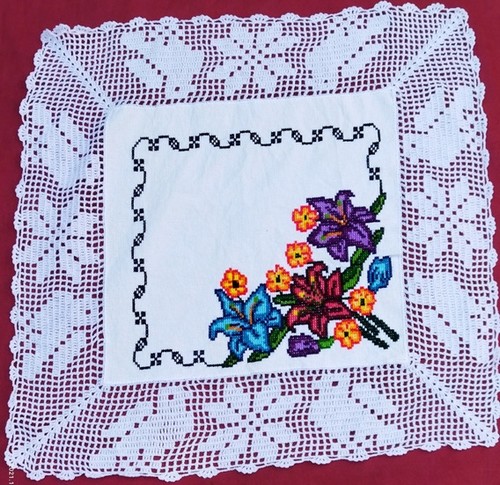
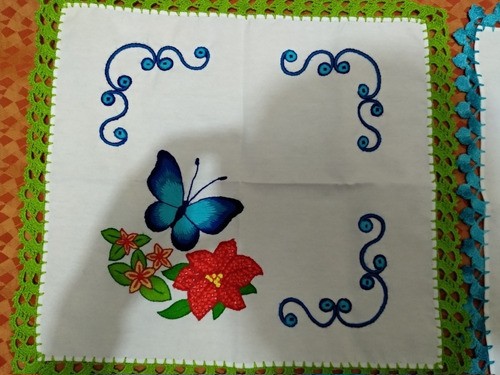
If, on the other hand, you like to embroider by hand and you have experience, you can use a wide range of embroidery stitches, which give the final work and the fabrics different textures and different shapes to your embroideries. If you wish, you can complement the embroidered napkins with crochet borders. Your amazing napkins can look like a jewel worthy of royal tables since they can combine various arts: napkin designs, hand embroidery and crochet borders.
Custom embroidery for napkins
One of the most used and interesting ideas to embroider napkins by hand is with the initial letters of the name of family or friends. The embroidered letters on the napkins give a very special detail and personalize the piece.
Types of embroidery for personalized napkins
If you have decided to embroider your napkins by hand or prefer to use the machine, remember that the last details are very important for the final appearance of the work. Take care of the details, dedicate all your heart to your work and apply your good taste and delicacy to the fabrics.
The choice of wool colors and materials is very important so that the final result of the work is the best. This, of course, combined with his good taste and the care with which he develops his embroidery projects.
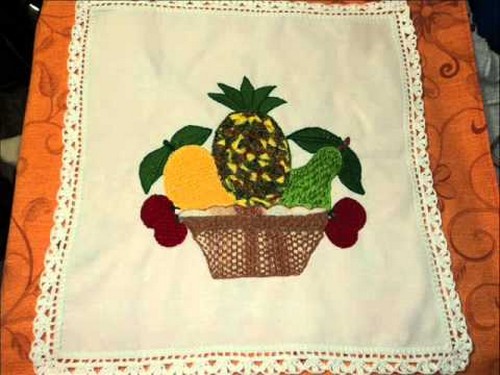
Fruit embroidery, simple as it may be, is also widely used on napkins. This type of embroidery works well in a rustic kitchen to add a bit of color to the room.
Next, we present these beautiful ideas for embroidering napkins:


How to embroider napkins
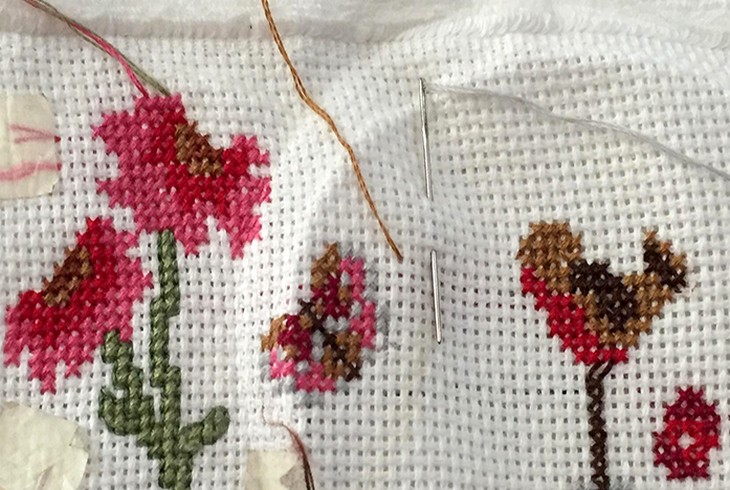
To embroider the napkins we need the following materials: a ball, a needle, a 30cm x 30cm square piece of cloth (or other approximate measurements), threads of different colors, for example: red thread, green thread, black thread, yellow braid , blue and brown wire, among other colors. In the case of machine embroidery, we obviously need a machine.
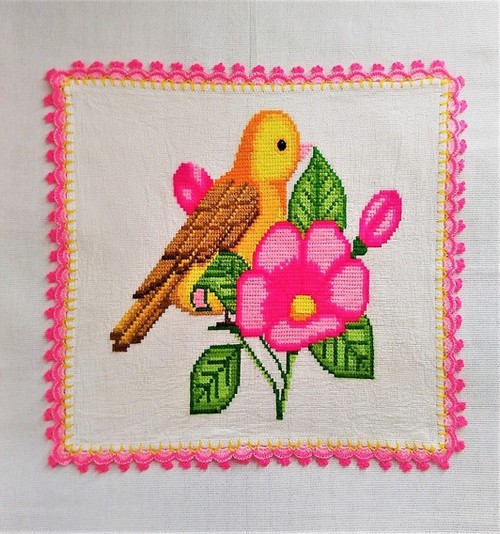
Once we have the necessary materials, we begin to design the embroidery that we want to place on the napkins. Among the most used designs we have the motifs of animals, flowers, leaves or others. You can embroider everything, although there are more suitable models for embroidering napkins. If we do not want to embroider designs, we can cross stitch, counting the points of three or four for each cross we make. If we embroider every day, it takes us two or three days to embroider a napkin. However, this time depends on the skill level and speed of the seamstresses.
In addition to lunch and dinner, you can also show your embroidered napkins to your friends and family at tea time. This way you will add more magic to those moments. In addition, you can combine the embroidered napkins with coasters or tablecloths. The set can work very well, but do not overdo the amount of embroidery, so that it does not seem heavy.
Materials used in napkin embroidery
As for the materials used in the embroidery of the napkins, they had already been indicated in the previous point.
Before you start embroidering each napkin, you need to cut out a square of the desired size, adding another 6 cm. That is, if you want to make 30cm x 30cm napkins, you need to cut a 36cm piece of fabric. This is one of the most suitable sizes for making napkins.
Do not forget that each of the squares must be cut as accurately as possible. This way you will have napkins with the perfect corners. To facilitate your work, you should do it on a flat base, using a ruler to mark and a cutter to cut the fabric. As an alternative to this solution, you can make the mark with a pencil and then cut the fabric with scissors. But you need to do this very carefully, so that the corners of the napkins are square.
After cutting the napkins, what happens next?
1. Make the seams
To sew, start by turning the fabric inside out. But first, he confirms that the edges and corners are folded correctly. To make your work easier, measure the fabric with a ruler and make a mark with a pencil. In this way, the folds of the fabric are even on all four sides. And if so, then the corners of the napkins will be straight and square.
Then find a way to turn the square, and then sew the other edge of the fabric. Repeat this process on all edges until they are all flat.
Then fold the edges in 1/2 cm and repeat for all the other edges.
2. Create the corners
Turning is very easy. To get started, you need to open the folds you just created. Then you need to draw an imaginary line through the corners, so that it connects to the double points.
Then cut the corner of that imaginary line you drew.
Then you need to fold each edge once more with this size: 1/2 cm.
After finishing the previous step, fold the corner of the napkin into a flap.
To finish the job, fold each side of the piece as you did in step 1. When you get to this point, you’ll see that the corners of your napkin are now nice and symmetrical, with all the excess. each edge in.
3. Sew
That’s where the sewing machine comes in. Use your machine to sew one seam on each side. Always choose to sew along the folded edge. When you get to the corners, stop sewing and after ironing, start again. The ideal is to sew the entire square in one step. If you don’t want to sew by machine, or even if you don’t have a machine, don’t worry. This work can be done by hand, but it takes more time and is not as perfect.
At this point, you are done sewing. Then comes the embroidery part.
4. Add the embroidery
If you want to unleash your creativity, you can embroider for free, or make a design that you like and then embroider. To embroider in a straight stitch, it is enough to pass the needle from the inside to the outside of the napkin.
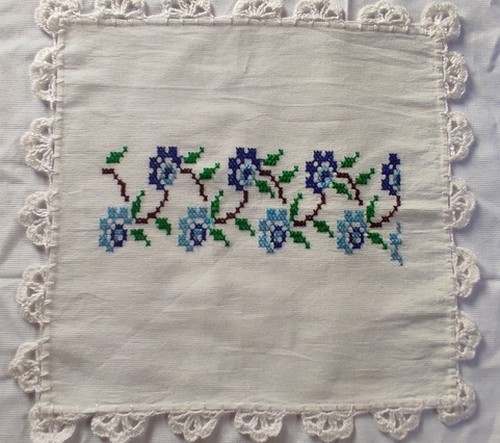
If you want to use cross stitch, you must first make stitches that point only to one side. Then go back and embroider over them, in this case pointing the other way.
As an extra tip, I want to tell you that whenever you want to embroider a fabric, it is advisable to leave a loose thread at the beginning. If you have enough thread or extra thread, simply tie a knot and then cut it off. Gather the two ends of the yarn, make a tight knot so that it does not come loose, and cut off the excess yarn.
I hope these tips for embroidering napkins are useful to you in your day to day.

Nice